Wednesday, December 25, 2024


 The Millville build - Part Two

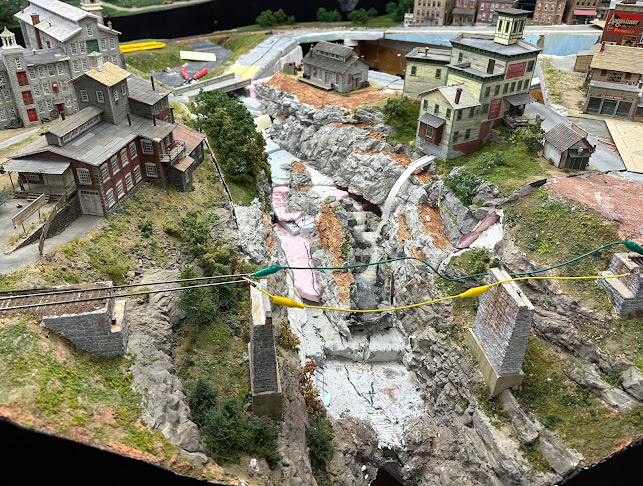
Okay, we are moving along with the process. In these next 4 photos I work on the placement/trimming of the diorama sections. Also the process of adding the needed rock work to extend down to the riverbed is started.

First, I fiddle with the parts in place...


...Then I add/extend the rock work & test fit.


  Working from the bench, rock work is extended and staged to install...

 
Sections with new rockwork test fit


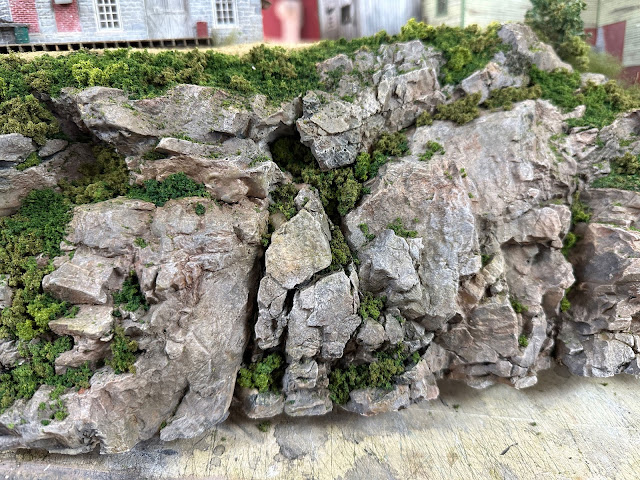
Two Photos, one overall and one close up showing the finishes on the rock 
and the initial application of ground scenery.
 

I use watered down acrylics and when dry, lightly apply some Pan Pastels in a few areas using cheap make up brushes.

The final finish is a very sparse dry brushing using the craft acrylic color "linen", which is very close to the old Polyscale "concrete"

For the "initial" ground work, I start with sieved fine dirt, then Woodland scenics fine blended turf, topped with various Woodland Scenics coarse turfs. Emphasis on the word "initial"…As in any product available (Scenic Express) by Busch, Martin Welberg, Noch, Silfor and so on...


Major parts in place & water features added on left side of river.


First trees added and water features added to upper reaches of the river.


Tuesday, December 24, 2024

 The Millville build

Millville is one of the largest (almost 40 sq.ft.) & most challenging areas to fully develop. In addition to the city proper, it abuts a river that fronts Delabarre Tap &Die and the Threadwell Mills complex on the opposite side of the river.

I started the Millville area over 20 years ago. In recent years, I’ve redone the track, moved the Cambridge Crossing complex and added a couple pieces of Dick Elwell’s Hoosac Valley railroad. These areas have worked around the edges of the city which, once completed will set the stage to complete the inner part.

My current focus is the river valley with the original, one-off Robinson Electric building on the city side & Delabarre on the other side.  So, let’s get started….

Robinson’s Electric, Delabarre & the River


Looking at the river valley, two things became apparent to me right away. First, this river/building scene is at least two decades old, and it showed. The river scene was dusty and worn. On one of his last visits, Dick Elwell pointed out that there was a dead mouse in the river. Due to it extremely desiccated state, I surmise it had been there for quite a while…

…OK, time for a change. As I decided to rip out the majority of the river scene, some things came to my attention. First, I took a look at the original Robinson‘s and realized that it was slightly for what I had done with Millville to date & envisioned for the rest of the city. Second, I still had my original diorama for the kit of Robinson‘s Electric. This was one of my favorites & I had decided some time ago that I would not sell it. Needless to say, I now had a path forward (a place for the Robinson’s Diorama)…

Original river scene - done in 2005

   (One more)  Original river scene - photo from about 2005 

 An idea forms and I do some prep work..

I put a mock up of the kit version of Robinson's next to the original freelance & decide to go head with the site modifications and installation of the kit version of Robinsons.

(Tear down follows)

Tearing out the river and much of the old rock work.
 
Putting things back together 

As can be seen in the previous photos, there are some styrofoam blocks and supports put in place to start the test fitment. 

Okay, after running the diorama through my large bandsaw, I have two major pieces. I start to see the first “adjustments” that need to be done. 


Modifications to the above photo.

A. Make two diorama into three diorama pieces by removing the river/falls section. 

B. Cut out the stone building and reposition at an angle to the main building.

C. Add preliminary layers to middle section to re-establish the riverbed.

D. Start adding new stone work to the large (right hand side) diorama section.  

At this point (moving forward) I moved these three sections around between my layout & my work bench, gradually building them up, modifying, re-fitting & so on. Given how deep into the layout this area is, it was the only practical way to proceed. At the deepest part I crawl under the layout and pop up at the end where the dam is.

More to come soon.... 


Monday, November 18, 2024

 (This post replicates my 11/18/24 post on Facebook)

I have a new batch of photos posted on Flickr:
 
The lead off photo for my update is kind of a tribute to Dick Elwell and his Hoosac Vallet RR. I've been holding back for a while on updates as I've also been working on an article, doing a lot of layout reshuffling and so on...
 
....However, there's never a prefect time for anything. In my usual "last to know" fashion, I just learned (today) about the passing of Doug Foscale's wife, Amy. As I post this update, know that for my wife & I this sad event is foremost in our minds.
 
...So, peruse the new photos - but if you haven't already, first spend some time with the photos on Doug Foscale's Facebook page...


Saturday, October 19, 2024


Rambles on sunny fall days in Berkshires

A couple rides in the Berkshires. The bridge, the Bardwells Ferry Bridge, you may recognize from my layout pictures. Unfortunately, it is currently closed for repairs in the distant future. The photo of Bardwells Station was taken on the other side of the bridge in 1920. The double track back then and what appears to be a passing sliding is the old B&M East West Main line. The deck truss bridge in the distance is still there today, supporting almost daily freights on the remaining single track. At night I can hear the long freights moving through the Deerfield River valley a couple miles away and below where I live...

 
Bardwells Ferry Bridge Today
 
 
Bardwell Station in 1920

 
Bardwell Station is long gone, but the old B&M Main line remains.


A ride on a back road ( South River Road) took me to the Buckland/Charlemont border. Now, just off the picture is a steep drop and at the bottom is the old Boston & Maine mainline following the Deerfield River - to the Bardwells Station site if you head downstream...too much foliage to see, but there are a few hints of the Deerfield River that can be seen through the trees.


For all the years I have lived in this area I didn't know the name of this road until I saw it on my ride!


Last, this is not my pic, but an area I visit often. Chester MA has some great artifacts, walks, a station/museum and more...read all about it here:  

https://keystonearches.com/ (https://keystonearches.com/)


Sunday, October 13, 2024

Static Grass: Sometimes, it’s just a little tweak that makes a process work….

I struggled with static grass for a couple years. No matter what devices or techniques, the grass would just lay flat.  This year, I learned from some others, and I added my own technique to the final stage. First, though…

....I bought the Woodland Scenics Static King applicator, which has a power supply. You need POWER! Besides the point that a nine volt battery is just not enough, it looses most of the power needed for this task within minutes.

Then, I met with Martin Wellberg at the ARS show in MA and talked to him at length.  After explaining the virtues of the Static King, I watched how he applied the base glue, handled the device and added a multitude of little tips that helped tremendously. There are a plethora of videos on Youtube, but I encourage you to look at his video here:

 https://www.youtube.com/watch?v=UakltWBRJ_s

My technique with the final layer. My photos show the part I want to stress as a bit different - the final grass layer. I use the popular layering technique where you start with using a wide, moistened brush to apply almost any water based glue to apply your first grass layer. As Martin will point out, all glues will start to dry almost immediately and the fibers have to be applied in a timely manner to pierce the skin on the glue (don’t dawdle or use fast glues like carpenters glue!) This first layer (for me) is 2mm grass…

…which I will skip (leave it to Martin's video) and move to the final 4 or 6mm grass, here is the difference:

The overseas product for this step is to apply an aerosol spray on top of the first layer (2mm grass), which is very nice & works great. However, aerosol sprays can’t be shipped overseas to the US. Instead, in the states we get the pump spray, which resembles diluted white glue. In my experience, this just makes a mess and leaves a glue applicator this is difficult to clean and keep working. So, here is what I do…..

….I apply the 4/6mm grass as soon as I can (while the 2mm is still wet) to assure good current flow. My final glue solution has been to just use cheap aerosol hair spray. I’ve used this for a couple decades to attach fine WS fine turf to various deciduous and conifer trees that I make. In my photos, I do a final stage of 4/6mm grass on a small area I need to “rehab”. Note that application of hairspray in the first pic (about 1.5”across). The nozzle is held about 1” away. The thousands (?) of small beads you see indicated it's properly applied. Now, immediately apply your 4/6mm grass.


Some final points; I haven’t tried even more layers. I favor Silflor Miniature static grass. Besides the more natural looking color range, I’ve always had somewhat better luck with it. Could just be me…also use Noch at times.

Thursday, September 19, 2024

Welcome to my blog! Please bear with through set up, expansion and maintenance. Should you need instant visual gratification, check these links for layout progress and info on past kits.

Photos of most recent (post retirement) work on the South River & Millville layout.

https://www.flickr.com/photos/103194951@N02/sets/72157683576799481/

Photos of all my kits, made from 1991-2016

https://www.flickr.com/photos/103194951@N02/collections/72157722282077440/

Photos of early layout work and processes.

https://www.flickr.com/photos/103194951@N02/albums/72157685988008225

https://www.flickr.com/photos/103194951@N02/albums/72157688049150572

I strongly believe in living in the environment I model. New England has always had a powerful influence on me, it’s history & the imprint left by one of this country’s oldest and most enduring regional cultures. I think one of my best strengths in layout building is to use my various design skills and love of history to convey a "sense of place" for my stomping grounds.

The influence of my good friend, the late Dick Elwell, on the design of my layout is very strong. When I first visited Dick’s layout, I instantly saw an entire landscape. This first impression stuck with me and connected me, not only with the person, but with his philosophy of creating “ a place.” one could relate to. You could also say that all the parts have to connect to” the whole.”

The layout built around a single track main line running peddler freights and local passenger service. I like the areas of western Massachusetts, southern/central Vermont and eastern New York to the west of those areas in Vermont and Mass. I run both steam and diesel creating scenes covering roughly the 40s to 1960.

Overall, I would say my layout is prototype inspired, though not a strict prototype representation. However, my kits are primarily based on actual buildings. As such, about 25 or so of my kits are embedded in the layout, framed by new England rural settings. This provides the overall “picture” of my “reality” as I see it.

 Current Track Plan - Click to enlarge.

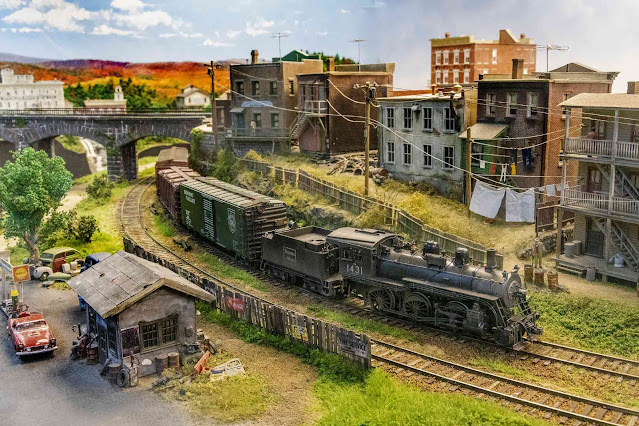
Overall layout views below. About 60% of the layout is finished. The rest is operational and needs final buildings and scenery


  The Millville build - Part Two Okay, we are moving along with the process. In these next 4 photos I work on the placement/trimming of the ...