Sunday, March 30, 2025

 A Roundhouse Story....

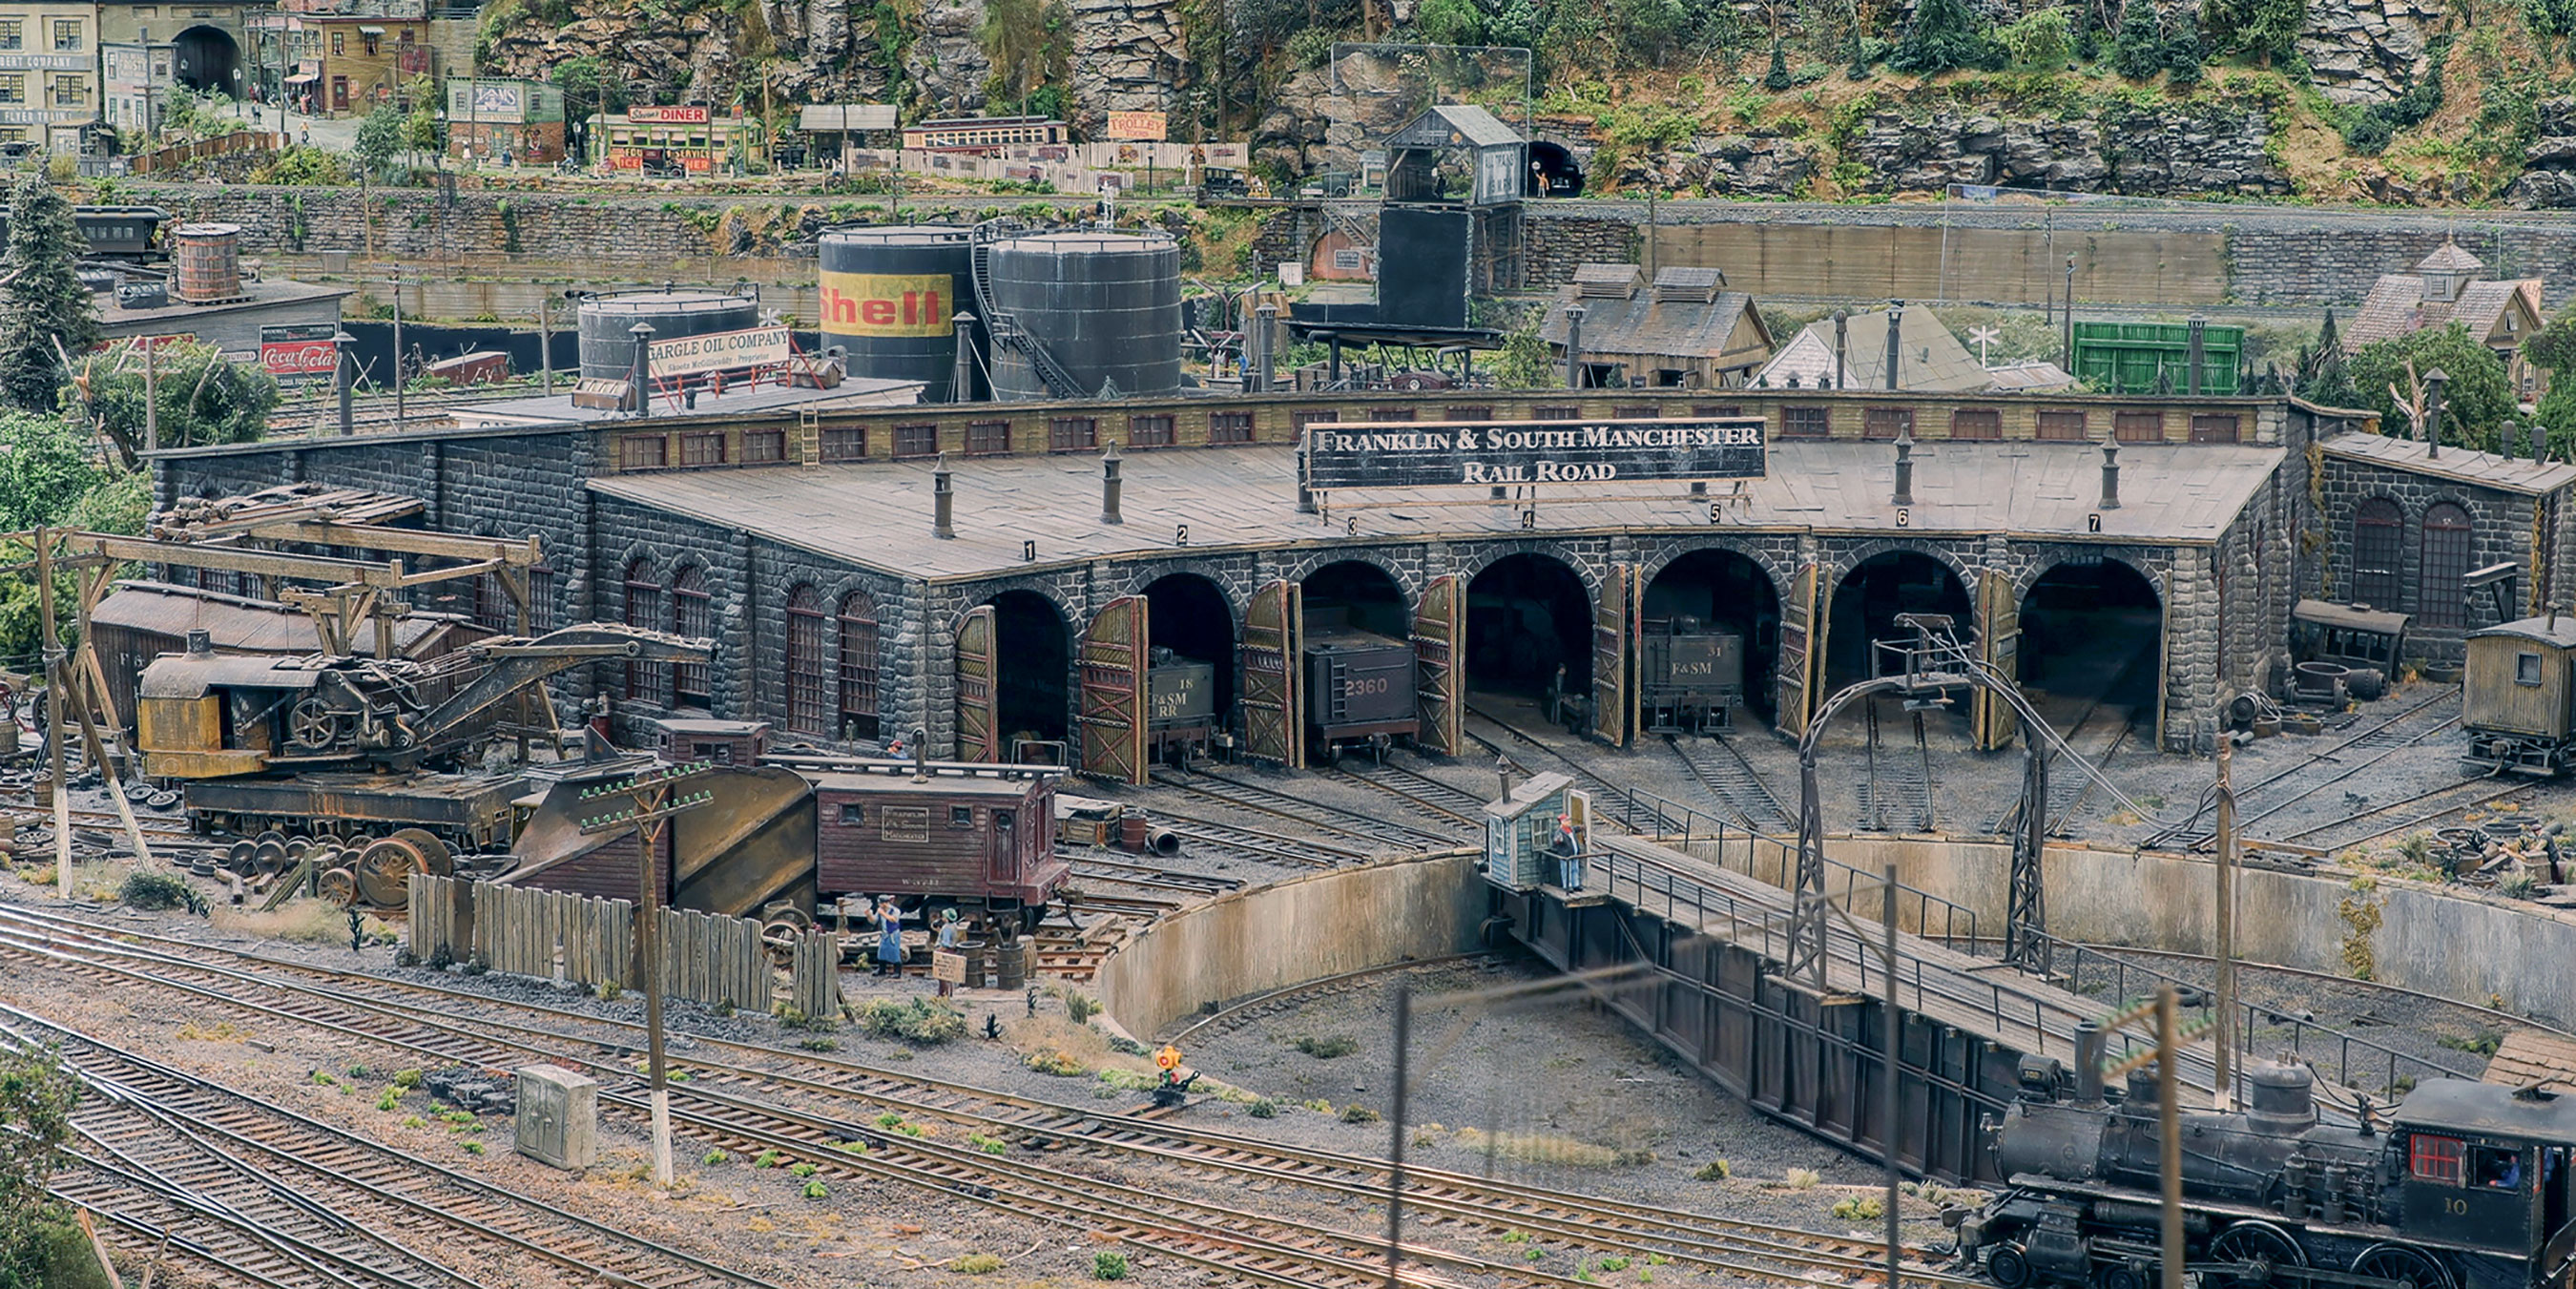
I’ve been accumulating stuff in my shop and under the layout for 35 years. On the eve of my 75th birthday, I decided to take a look at my Stone Roundhouse/Kit 160 diorama, which has been hiding under a corner of the layout for at least couple decades. It’s in good shape, so while it was out I cleaned it up a bit & took a couple new photographs. For years, my Flickr site has had two pics: one view of the display model and one pic of George Sellios’s build on his layout, the Franklin and South Manchester…so, I decided to better document this kit, photo - wise. 


                         Recent photos of my original diorama

When people visit, I am often asked about how I got started making the Roundhouse kits, so I thought with this post I could not only provide some better pictures but also tell the story of how it became a kit, for anyone who might be interested.


In the spring of 1994 , I had been only making kits for a few years. I was about done selling my fifth kit, Martin Machine and was getting ready to do my sixth kit, Rugg manufacturing. I had already been talking to Sellios. He seemed intrigued with the masonry patterns I was doing. I first met George early on thanks to an intro by my good friend, the late Dick Elwell.  I started going on private visits to George’s with Dick and couple of our friends.  At the time, I would tag along with Dick and his long time buddy, Jimmy Smith, during private visits.  Dick and Jimmy were helping cure some electrical demons. During these visits & others I would arrange to stop by to talk shop with George, which was a great opportunity.  


During a visit in early 1994 he asked if I could make patterns for a round house in the image and spirit of the John Allen Roundhouse. Like George,  many of us were huge John Allen fans, so it naturally piqued my interest. 


                                Sample wall done for George Sellios in 1994

I learned that the John Allen Roundhouse had been carved out of linoleum, of all things! So, during the first half of 1994, I did some research, found a plan for an old Maine central roundhouse and then made the wall patterns and molds for the side walls and the back. When I was done, I brought a demo side wall that I made (which I still have, see the pic) over to George’s. He really liked it and with the walls done, it was easy enough to see how to construct and support a roof - and essentially complete the building. George took me by surprise by asking if I might build it for him, too! I had to decline as I was too busy doing a kit for an early fall release. Nevertheless, George was very enthusiastic and was insistent that it would make a great kit. I was still nervous about “survival”, being a fledgling business and so forth. I was pretty risk-averse and told George I thought a  kit might be too big and too expensive…and besides, I was already busy preparing a kit for the fall....Anyway, I finally gave in and decided to make 100 so if it was a failure, I wouldn’t be hit too badly…


Well, most people know the rest. The 100 kits sold out in a couple days. I made about 50 more and then 175 more following year (which was still not enough to fill demand). The second run sold out in less than a week. In the midst of this success, I was unwittingly becoming a glutton for punishment...after almost no rest, I proceeded to do extra stall kits during the next couple years. Again, I could never make enough. The whole venture had me run through about 3 tons of plaster. My back is still recovering (true story) from my 1994 - 5 production activities. 


It took one more venture to finally give my back a long rest...After a 5-6 year break, I went through the same cycle again with the Brick Roundhouse (kit 220). 


Photo by John Siekirk taken on the FS&M
 
 
 Photo taken on the FS&M
 

 Photo taken on the FS&M by Al Pugliese
 
 
 Photo taken by John Siekirk of the build on his Superior & Seattle RR.
 

I was very proud  (and still am) of the roundhouse kits. They were done with absolute precision… or as precise as one can get with a handmade item. I even calculated the width of the included glue joints to get a precision fit on the back wall. When the dust (literally ) settled, the reward (and the best part)  of the roundhouse venture was seeing many of the successful builds by customers. Some years later, George built a three stall version of my brick Roundhouse for his smaller yard - something most people are not aware of. It’s actually a special Brick Roundhouse than only four people have. It’s 13 1/2 inches in depth instead of the standard 15. I built one for myself, and for the other three I made the parts for Dick Elwell, a friend of his and George Sellios.


The following are photos of the "Short" Brick Roundhouse by Dick Elwell, George Sellios and myself.


Four Photos from Dick Elwell's Hoosac Valley


 Two photos of the "Short" Brick Roundhouse on George Sellios FS&M Layout.

Photos by Al Pugliese.


Two photos of the "Short" Brick Roundhouse on Bob Van Gelder's South River & Millville Layout.
Yard construction is "in process" 

In the years since  I’ve made patterns for a couple smaller round houses, but decided I was past being able to physically work with that much material again…I have to admit, though - it would have been fun!


Friday, March 14, 2025

Barns Barns, Barns... like my previous post, I’m sharing my observations of what’s around us. That activity plus trying to keep current on the hobby is a daily event that I never tire of….

This is our barn. I want to call your attention to several things. First, note the range of color in the slate roof. Next, check out the weathered paint. I think this is one of the nicest features. I cringe every time someone buys an old farm, rips off the slate roof and then paints over a nice patina that took decades to form.

I had a lot of work done on this barn. This sills were rotted and it was poorly supported. About 30-35 years ago I had a crew jack up the lower level, pour about a dozen 12" x 5' tall Sonotubes tubes (buried all but 6-8" in the ground) filled with concrete to support the walls/new sills and interior point loads. Cheaper than a new perimeter foundation and it allowed me to retain the stone foundation. Also, as it is close to the river, when the water gets too high during a climate event, it just runs through the foundation. I learned this trick many years ago when doing some "wash-away-first-floor" design work in Florida.

During this "rehab" most of the wood siding on the lower level had to be removed.  Much was rotted, anyway. To match the upper level, I applied my modeling skills and did some "full scale modeling/weathering".  Specifically, I first applied a coat of Benjamin Moore "Driftwood" stain. On top of that (using a wide brush) I dry brushed a straight white stain...Viola'!


The three pics above are of a barn about a mile from me. It's not in good shape and it is unlikely it will be fixed...so, I've taken many pics and done some sketches. One of the sketches is in an album on my Flickr site: 
 
 
Note the the raised seam panels on the first photo - they conceal an older split wood shake roof (most likely cedar) that was probably laid down over 100 years ago. The metal roof probably dates anywhere from the 40s to 60s.


This last barn belongs to a neighbor who lives up a hill and a few hundred yards from us. It's a very popular visual attraction. Not unusual to see someone with an easel doing a painting (including a stellar example by a good friend) ...or an itinerant model railroader replicating it on his layout (yes, that's me - it's on my "farm"). 

In keeping with my story about "weathering" the new paint on my barn, I encouraged the owners to do what I did when they had some repairs done. They didn't precisely match the paint, but most importantly they preserved the original paint. The resultant variety of finishes and "mixed masonry" are in keeping with the visual traditions of the New England Hill Town culture.


Thursday, March 13, 2025

I turned 75 today, so I decided to take a walk. This is also my first walk since winter began. I am not as immune to cold as I used to be, so it was a joy to take my traditional one mile walk down the road to the view I have as a header on my site.

This walk is kind of like a tonic and a constant inspiration. Reflecting on 3/4 of a century of existence in the middle of the current Democracy crisis has not been very pleasant.... However, living in a beautiful setting that exists in a bit of a time warp is uplifting and inspiring. Here in the hill towns we are still heavily steeped in the post WW2 traditions of Democratic growth and responsibility… a better memory/feeling.


Along the way are several “sign posts” -  markers & reminders of my interests. The fork in the road leads up the hill to the grand view…and beyond to Bardwells Ferry Bridge - site of a former station along the B&M and the NY, NH & Hartford lines. In the middle I am looking at the “South Station” sign, pointing down a dirt road to the right that is the old road bed for the Conway Street Railway trolley line. At the end is South Station, which was the starting point of the Conway Street Railway.


The Graves farm - near the top. The grade changes, peeling paint buildings, rough concrete retaining walls - these are some of elements where I find inspiration to add authenticity to my work.
 
 
At the top is a long view to the Pioneer Valley to the east. The fall version of this pic can be seen at the beginning of my Facebook page.


 More experiences with the WS "Static King".... A year or so ago I finally got some decent static grass applied on my layout. Much...